Mastering the .NET CLI
A Guide for .NET Development from the Terminal

Heya! I'm Lou. I love coding and trying out new technology. I've been interested in a lot of different tech fields for 5 years now. I like to blog about stuff I'm currently learning about or about topics I hear / speak about on other social media platforms.
I'm also Microsoft MVP.
Want to hear more from me? Follow me or check me out on Twitter.
Hi lovely readers,
Welcome to another blog post where we dive into more interesting .NET topics. Today, we'll be exploring a powerful tool that has become a staple in the .NET development community – the .NET CLI.
Understanding the ins and outs of the .NET CLI can significantly enhance your development workflow. From scaffolding a new project to managing dependencies and deploying your application, the .NET CLI empowers developers to set up all sort of things right from the terminal.
In this blog post, we’ll dive into how to get started with the .NET CLI, how to create and build projects with it and how to work with dependencies.
So without further ado, let’s get started!
The .NET CLI
You may have primarily used an Integrated Development Environment (IDE) like Visual Studio to build and run your code. However, the .NET CLI offers another powerful way to work with .NET applications through the command-line interface.
The .NET CLI, or .NET Command-Line Interface, is a tool that lets you interact with your projects using commands entered into a terminal or command prompt. It provides a simpler and more direct approach to managing your code, building it into an application, testing it, and even deploying it to different platforms.
With the .NET CLI, you can create new projects from scratch, add dependencies, compile your code into executable files, run tests to ensure everything works as expected and package your application for deployment. The CLI offers a consistent set of commands that can be used across different operating systems, making it convenient whether you're working on Windows, macOS, or Linux.
Even if you've been using an IDE like Visual Studio, the .NET CLI can complement your development workflow. It's flexible and can integrate with various tools, build systems, and package managers. This means you can continue using your preferred IDE while harnessing the power of the CLI for specific tasks or scenarios.
Another benefit of the .NET CLI is its support for multiple programming languages within the .NET ecosystem. While most developers will use it for C#, the CLI also works seamlessly with other languages like F# and Visual Basic.NET. This gives you the freedom to choose the language that best suits your project requirements without sacrificing the advantages of the CLI.
.NET CLI vs. IDE
When it comes to developing .NET applications, you have two main options: the .NET CLI (Command-Line Interface) and an Integrated Development Environment (IDE) like Visual Studio. Both approaches offer distinct advantages, and choosing the right one depends on your preferences and project requirements.
The .NET CLI provides a command-line interface, offering simplicity and flexibility. With its commands, it's a great choice for beginners and those who prefer a lightweight development experience. The CLI is platform-agnostic, working seamlessly across Windows, macOS, and Linux. It also integrates well with various tools and build systems, allowing you to combine its power with your preferred text editor or IDE.
On the other hand, IDEs like Visual Studio provide a comprehensive graphical environment with advanced features. They offer code editing, debugging, project management, and visual design capabilities. IDEs are ideal for complex projects or when you prefer a visually-oriented workflow. They come with extensive integrations and a wide range of features that enhance productivity.
To decide between the .NET CLI and an IDE, consider the following factors:
Simplicity vs. Power: The .NET CLI is lightweight and straightforward, while IDEs offer advanced features and integrated debugging. Choose based on your preference and the complexity of your project.
Project Size and Complexity: For smaller projects, the .NET CLI can handle most tasks efficiently. However, for large and complex applications, an IDE's comprehensive toolset might be more suitable.
In practice, many developers find a hybrid approach beneficial. They start with the .NET CLI for initial setup, building, and dependency management, then switch to an IDE for more advanced features. This allows them to leverage the strengths of both approaches.
Ultimately, whether you choose the .NET CLI or an IDE, the goal is to find a development approach that aligns with your workflow. Experiment with both options and select the one that helps you achieve your development goals most effectively.
Trying it out
Now that you have an understanding of what the .NET CLI is and its benefits, let's dive into getting started with this powerful tool.
Step 1: Install the .NET CLI
To begin, you need to install the .NET CLI on your machine. Visit the official .NET website (dotnet.microsoft.com) and download the appropriate installer for your operating system. The installation process is typically straightforward and well-documented, ensuring you have the necessary tools and dependencies to work with the CLI.
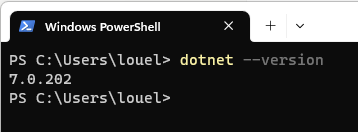
Step 2: Verify the Installation
After the installation, it's essential to verify that the .NET CLI is correctly installed on your system. Open a terminal or command prompt and type the command dotnet --version. This command will display the version of the .NET CLI installed on your machine. If the version number appears, you're good to go!
Step 3: Create a New Project
Now that the .NET CLI is set up, let's create your first project. In the terminal or command prompt, navigate to the directory where you want to create your project. Then, execute the command dotnet new <project-template>, replacing <project-template> with the desired template such as console, web, or classlib. This command will generate the necessary files and folders for your project based on the selected template.
For example, if we would want to create a console project it would look like this:

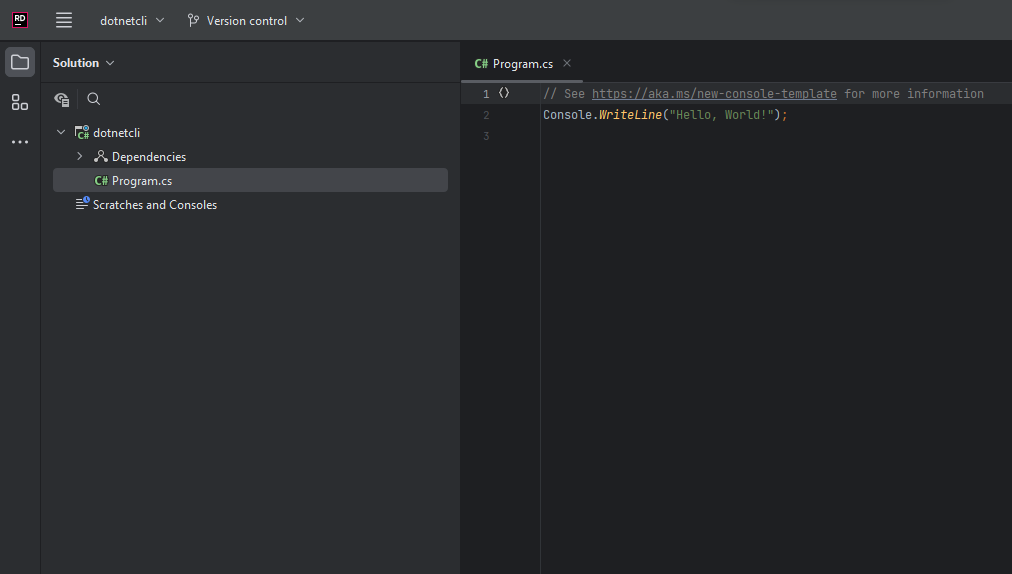
Finally, this is what it looks like in an IDE when we open this folder:
Step 4: Build and Run the Project
Once your project is created, it's time to build and run it. Use the dotnet build command to compile your code and ensure there are no build errors. If the build succeeds, you can run your application using the dotnet run command. This command will build the project if necessary and execute the application, providing you with the output or results in the terminal.
If you use the terminal from inside the IDE then building would look something like this:

Running from the IDE looks like this:

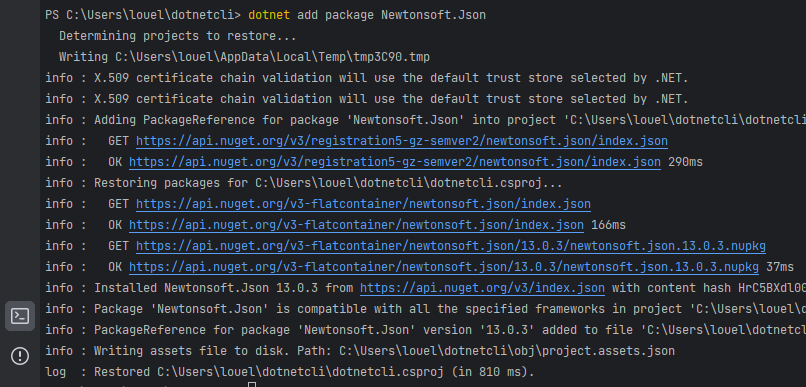
Step 5: Manage Dependencies
As your project grows, you may need to add external libraries or packages. The .NET CLI makes dependency management a breeze. To add a new dependency, use the command dotnet add package <package-name> in your project directory. This command will download and install the specified package, automatically updating your project files and references.
Step 6: Explore Additional Commands The .NET CLI offers numerous additional commands to help you with various tasks. For example, you can use dotnet test to run unit tests, dotnet publish to package your application for deployment, or dotnet clean to remove build artifacts. Take some time to explore the documentation and discover the full range of commands available.
By following these steps, you'll be well on your way to mastering the .NET CLI. Remember to leverage online resources, documentation, and community forums to enhance your learning experience.
Troubleshooting
While working with the .NET CLI, you may encounter certain issues or face challenges along the way. Here are five common troubleshooting tips to help you resolve issues and get back on track:
Verify Installation and Version: Start by verifying that the .NET CLI is correctly installed and up to date. Run the
dotnet --versioncommand to check the installed version. If you have multiple versions installed, ensure you're using the desired one.Check Project Configuration: Review your project configuration files, such as the
.csprojfile for a C# project. Ensure that the necessary dependencies, references, and settings are correctly defined. Missing or incorrect configurations can lead to build errors or runtime issues.Update Dependencies: If you're experiencing issues related to dependencies, ensure that you're using the correct versions. Run the
dotnet list packagecommand in your project directory to see the installed packages and their versions. If updates are available, use thedotnet add package <package-name>command to update to the latest versions.Clear the Build Output: If you're encountering build-related errors, try cleaning the build output. Use the
dotnet cleancommand in your project directory to remove previously generated build artifacts. Then, rebuild the project using thedotnet buildcommand.Search Documentation and Online Resources: When facing specific errors or issues, consult the official .NET documentation, community forums, or relevant online resources. Often, others have encountered similar problems, and you can find helpful solutions or workarounds. Be sure to provide sufficient details about your issue when seeking help.
Conclusion
In conclusion, the .NET CLI is a powerful tool that empowers working with .NET projects through the command-line interface. It offers simplicity, flexibility, and cross-platform support, making it an excellent choice for both beginners and experienced developers.
By understanding the basics of the .NET CLI, including installation, project creation, building, running, and managing dependencies, you can enhance your productivity and gain more control over your development process. Whether you prefer using an IDE or working primarily from the command line, the .NET CLI complements your existing tools and enables you to leverage its capabilities for specific tasks.
So, take the leap and dive into the world of the .NET CLI tool, explore, and enjoy the benefits of this powerful tool as you embark on your .NET development projects. Happy coding!


