Creating a Dino API in .NET While Writing Almost No Code
Taking advantage of the Visual Studio GUI and Minimal APIs

Heya! I'm Lou. I love coding and trying out new technology. I've been interested in a lot of different tech fields for 5 years now. I like to blog about stuff I'm currently learning about or about topics I hear / speak about on other social media platforms.
I'm also Microsoft MVP.
Want to hear more from me? Follow me or check me out on Twitter.
Hello lovely readers,
Today, we get into .NET 8 Minimal APIs to construct a Dino API to store the coolest of dinosaurs. Our goal is simple: leverage Visual Studio and the efficiency of Minimal APIs to create a fully functional CRUD API for managing information about dinosaurs.
We only use code to create the data model of the dinosaur, other than that we will use the Visual Studio GUI or the application itself. This blog post is great if you need to create a quick API in .NET or if you’re a lazy developer like me.
Let’s go!
Prerequisites
There are a couple of things you need before to get started:
.NET 6 or higher installed on your machine. I’m using .NET 8.
You have Visual Studio installed.
You know what CRUD is.
You know what Swagger is.
If any of these are missing then feel free to read up on it, there is great documentation out there.
Setting up the project
We’re going to create a CRUD API that stores different types of dinosaurs. Why? Because dinos are cool.
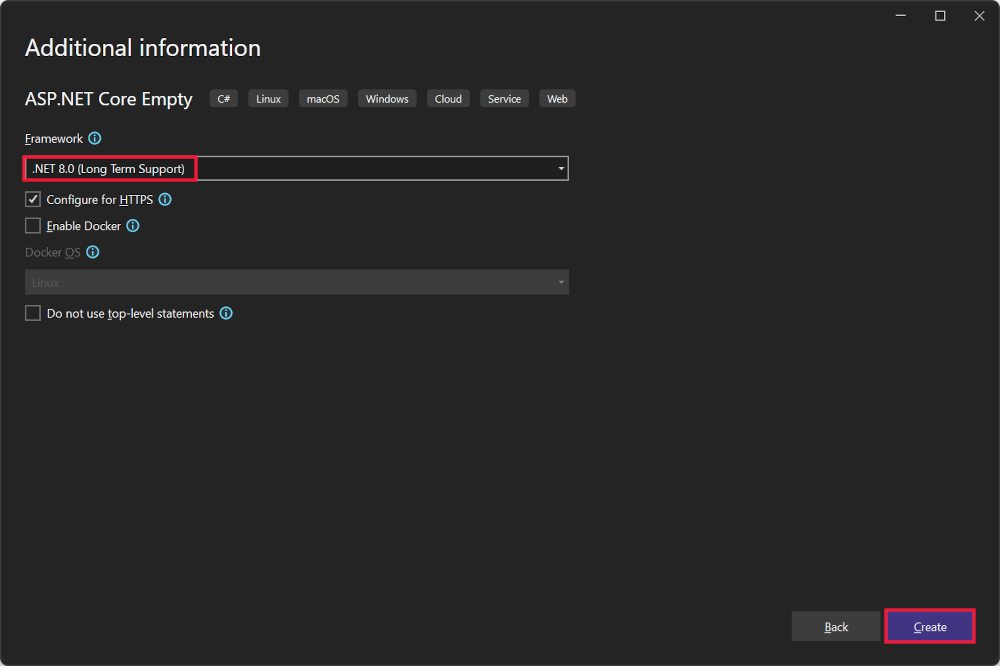
Let’s create a project in Visual Studio to get started. Pick the ASP.NET Core Empty project, select .NET 8, and click Create:
Through the dotnet CLI: You can also start your project by using the dotnet CLI. Go to the folder where you want your project to be placed inside the terminal. Then run the following command:
dotnet new web -o DinoAPI
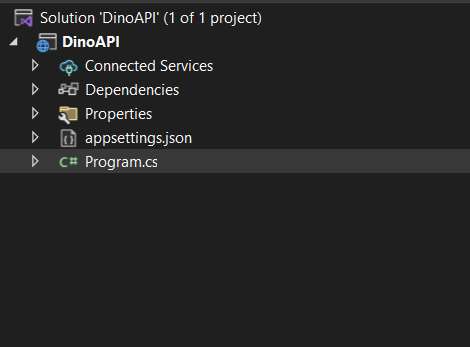
Your DinoAPI project should look something like this:
Creating a dino model
The only thing we need to come up with ourselves is the Dino model. What do we want to store about a dino? Here’s the model I came up with:
public class Dinosaur
{
    public int Id { get; set; }
    public string Name { get; set; }
    public string Era { get; set; }
    public double? Height { get; set; }
    public double? Weight { get; set; }
    public string Diet { get; set; }
    public string Fact { get; set; }
}
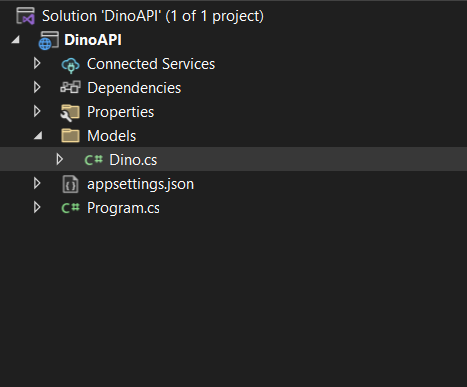
Let’s put this Dino model in a folder called ‘Models’ and call it ‘Dino.cs’. Now your project should look like this:
Scaffolding the API
Now that we have the model we can generate (scaffold) all the CRUD endpoints. We can do that by right-clicking on the project > Add > New Scaffolded Item:

Now we select ‘API with read/write endpoints using Entity Framework’:
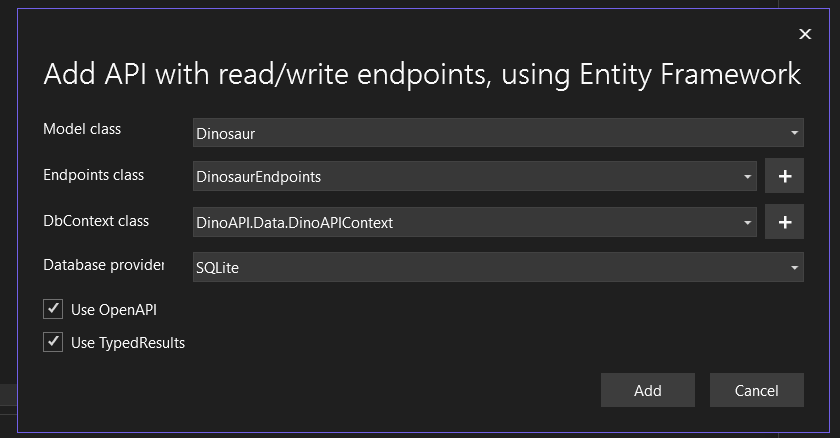
For the Model we’re going to select the Dinosaur model we just created. Let Visual Studio take care of the Endpoints class and the database setup by simply pressing the plus (+) button next to the dropdowns. Finally, select that you want to use SQLite so that you don’t have to deal with SQL servers or cloud providers. Finally, press ‘Add’
Checking out the code
Once the scaffolding is completed, you will notice some new files. The first one is the DinosaurAPIContext file in the new Data folder. You will also see a DinosaurEndpoints.cs file in the root. Here are all the newly created endpoints.
The endpoints are also added in the program.cs automatically. If you take a look in the program.cs you will now see the line ‘app.MapDinosaurEndpoints()’. Now let’s see what this looks like in Swagger. To be able to see the Swagger UI, we need to add two other lines under ‘app.MapDinosaurEndpoints()’ .
You need to add the following syntax:
app.UseSwagger();
app.UseSwaggerUI();
Checking out Swagger
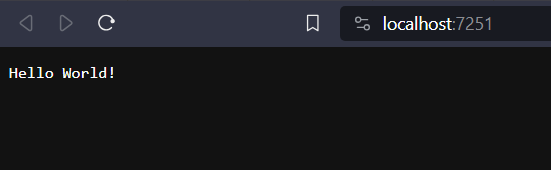
Press the green start button in your IDE. You should see a web browser pop-up that says ‘Hello World’:
Now add ‘/swagger’ to that localhost link to get to the swagger UI. Here you can see all the Endpoints Visual Studio has created for you:
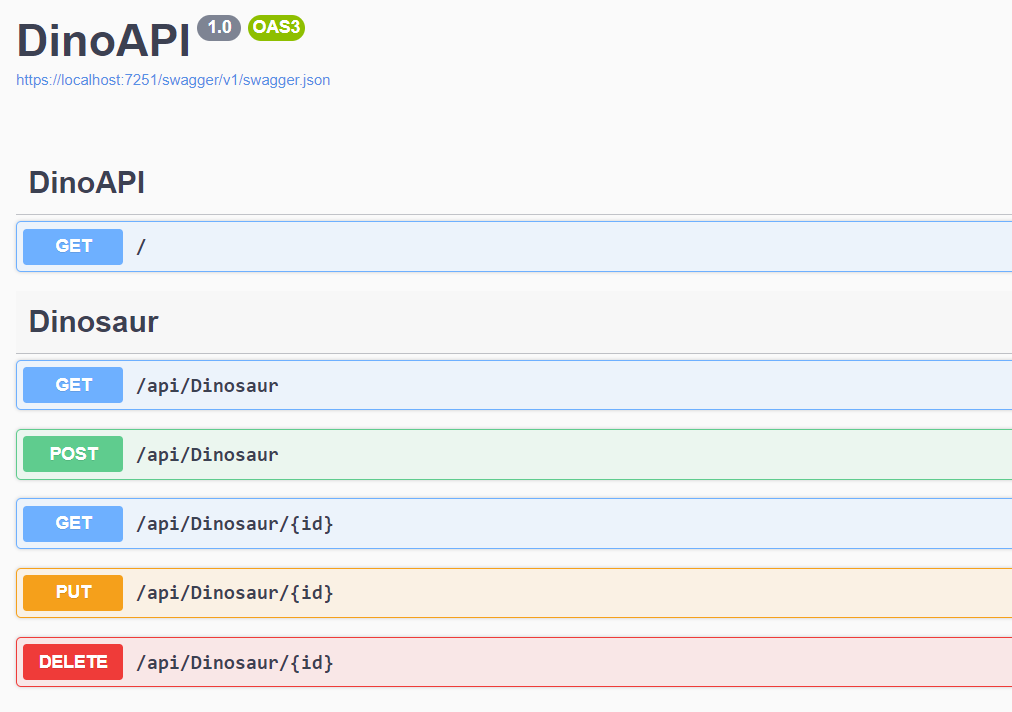
The simple ‘/’ endpoint is the ‘hello world’ string you just saw that is created in the program.cs without any database storage.
Database migration
Now you can try the api/dinosaur get function but it won’t work. Why? Because the SQLite database that Visual Studio created for you is still empty. So let’s fix that.
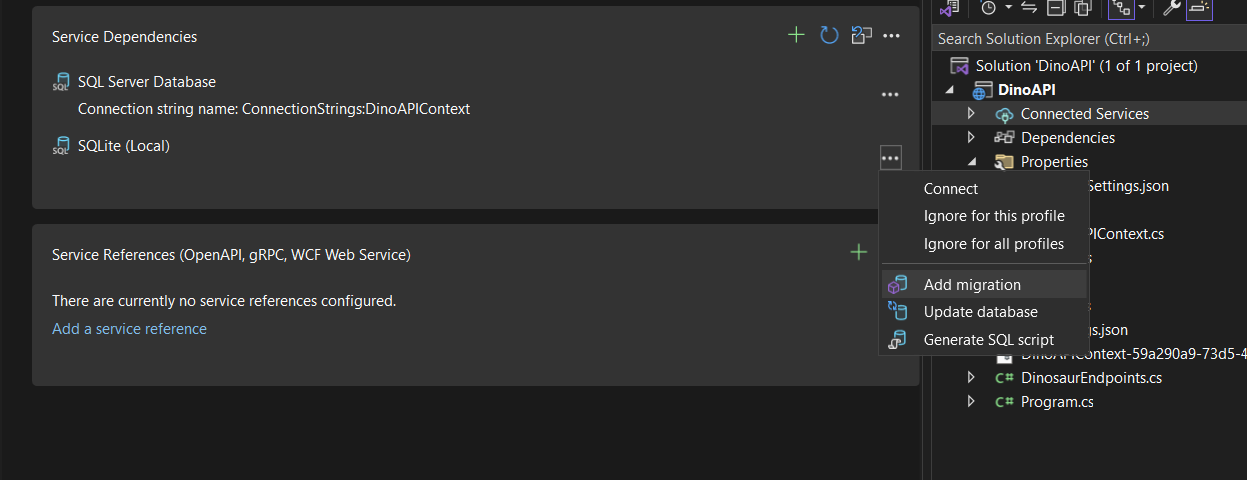
Of course, you don’t have to create the database table yourself, Visual Studio can do it for you. So click on ‘Connected Services inside your solution explorer (above your files). You will see ‘SQLite’ pop up, with 3 dots next to it. Click on the three dots and then click ‘Add migration’:
This will open a new screen:
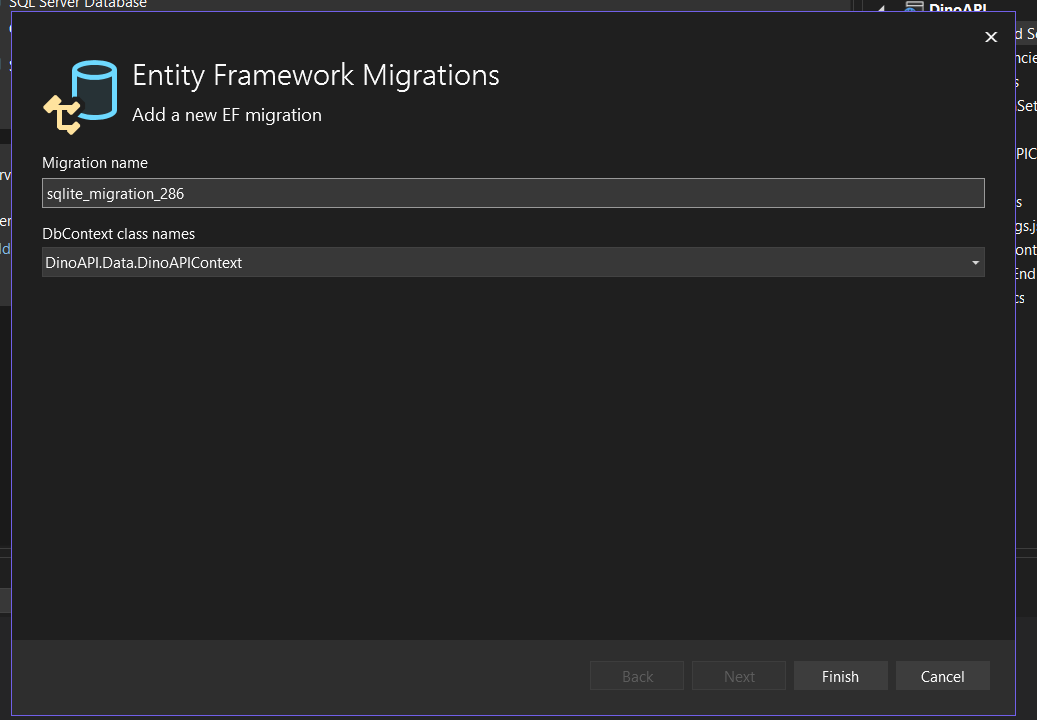
Visual Studio will look for a Dbcontext file and select it for you. Click ‘Finish’.
Now we need to update the database by clicking on the SQLite database in the Connected Services again, and selecting ‘Update Database’:
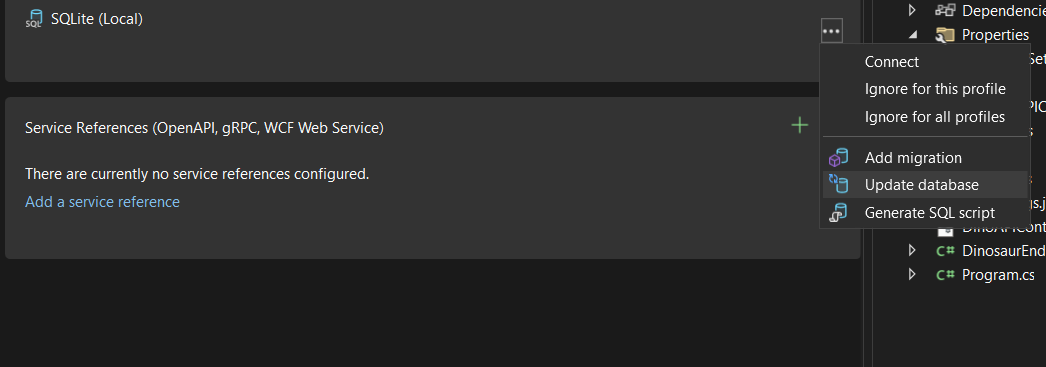
This will look for a migration that just took place and select it to get it through the database.
Let’s run the project again.
Going back to Swagger
Now we can start using the API now that the database has been filled with the right data. Let’s go to localhost:[port]/swagger.
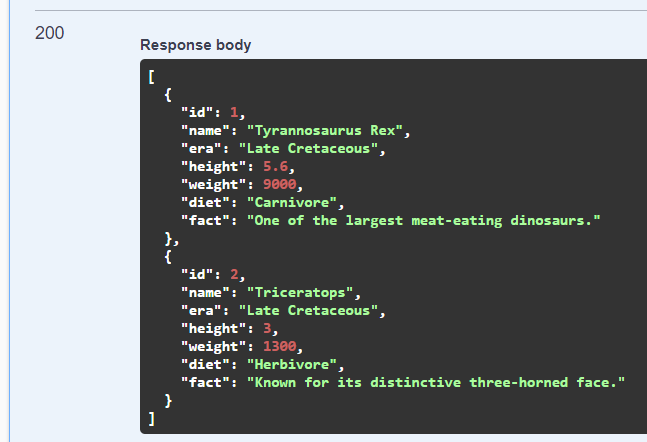
GET all method
We start with the GET endpoint to see if we get an empty list with HTTP code 200 to check if the database migration was successful:
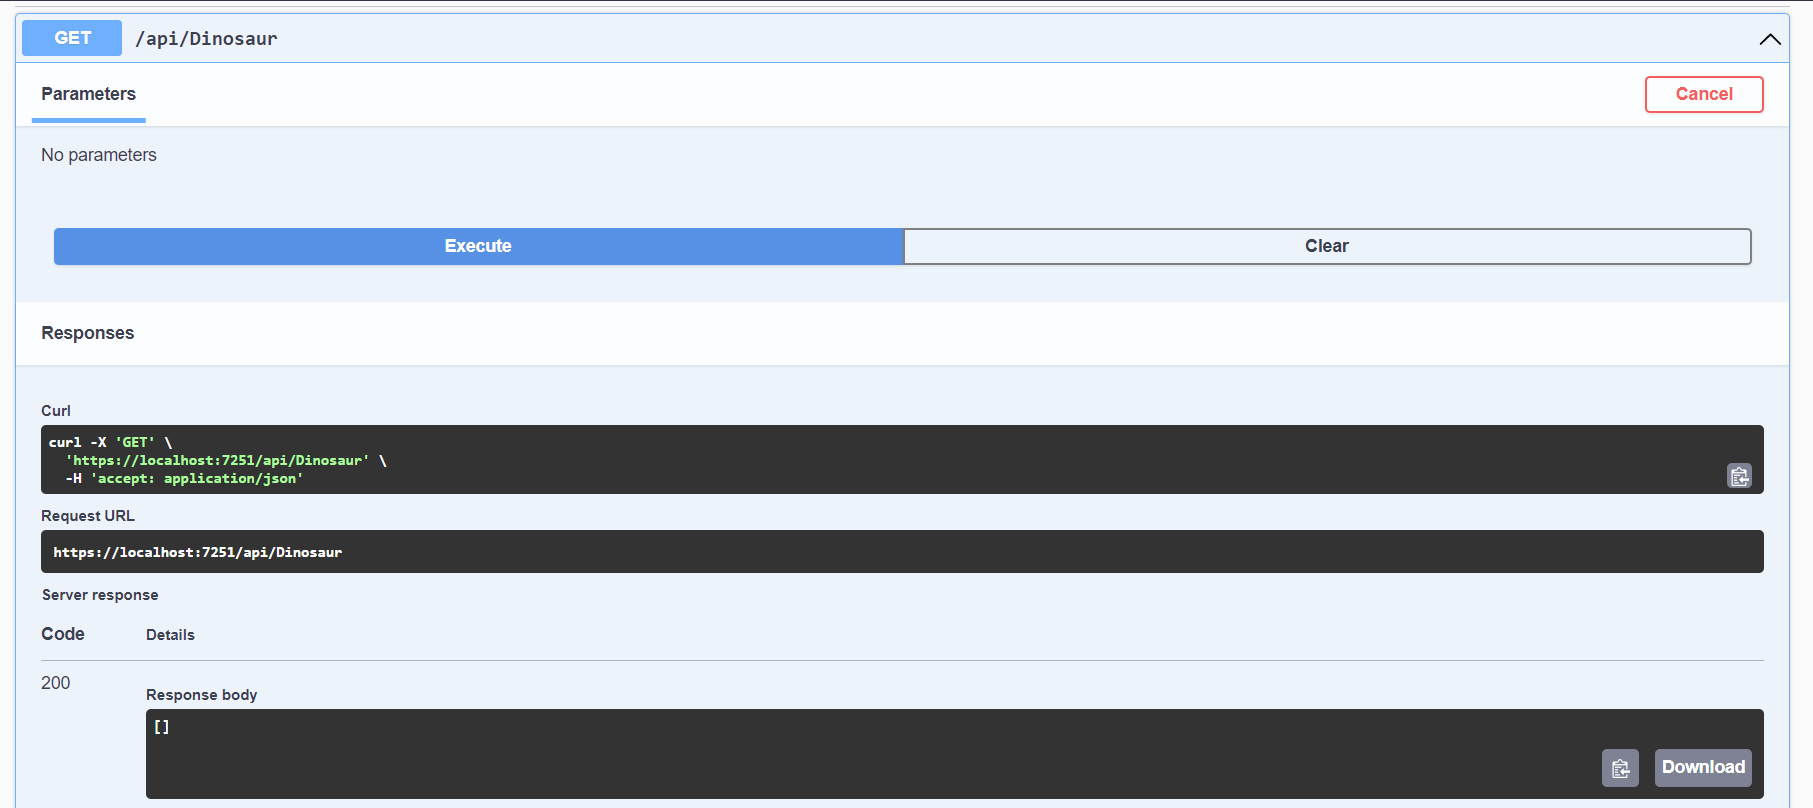
It was successful.
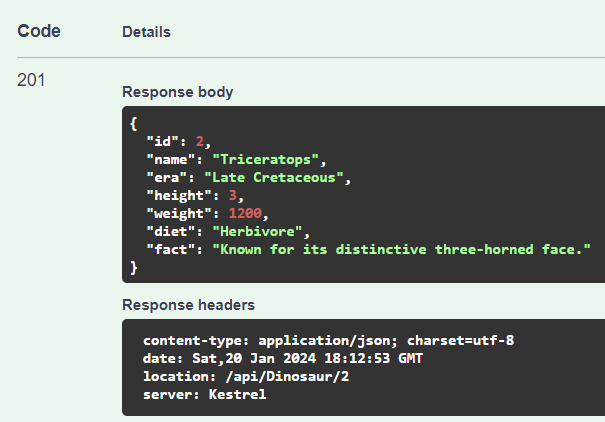
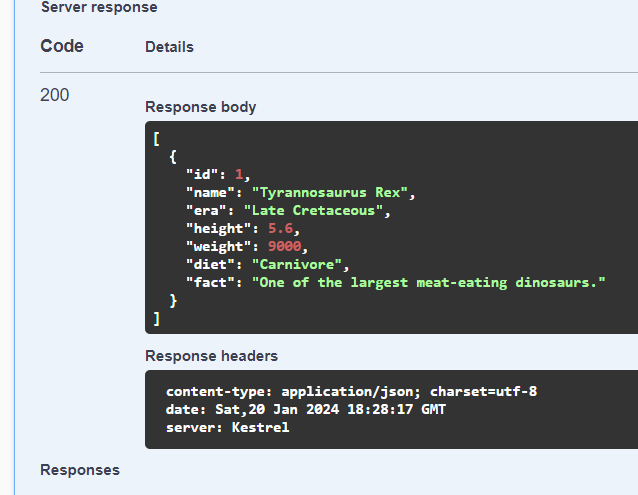
CREATE Method
Now let’s try the POST endpoint to create two dinosaurs. Dino 1:
{
    "name": "Tyrannosaurus Rex",
    "era": "Late Cretaceous",
    "height": 5.6,
    "weight": 9000,
    "diet": "Carnivore",
    "fact": "One of the largest meat-eating dinosaurs."
}
Dino 2:
{
    "name": "Triceratops",
    "era": "Late Cretaceous",
    "height": 3,
    "weight": 1200,
    "diet": "Herbivore",
    "fact": "Known for its distinctive three-horned face."
}
They both return HTTP status 201 - Created:
GET single method
Can we now run the GET endpoint with the Id to see if we can get the dino with Id 2 to show up? Yes, we can!
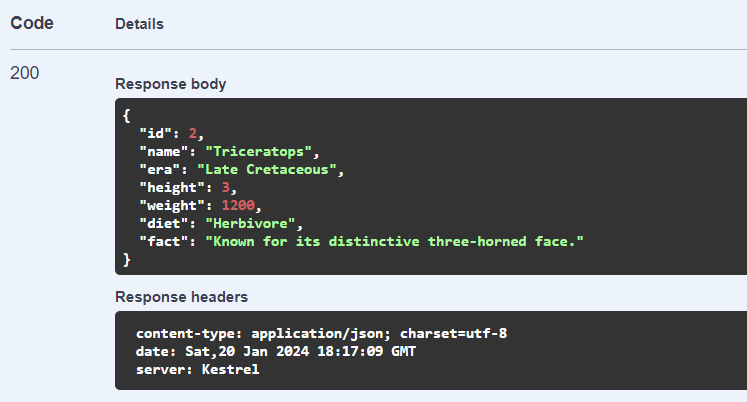
UPDATE method
Let’s update the dino with id 2 from 1200 kg weight to 1300 kg and check again with the GET endpoint to see if it’s altered:
DELETE method
Finally, we’ll delete the dinosaur with id 2 by using the Delete endpoint, and checking again with the GET endpoint:
That’s a wrap!
You did it. You survived through this blog post. Congratulations. I hope that this blog post was helpful for your .NET journey.
Do you have comments or questions? Feel free to leave them in the replies or reach out to me on any social platform. (find my socials on louella.dev/socials). See you in the next post!


