Build a To-Do List App Using Python Flask, Jinja2, and SQL

Heya! I'm Lou. I love coding and trying out new technology. I've been interested in a lot of different tech fields for 5 years now. I like to blog about stuff I'm currently learning about or about topics I hear / speak about on other social media platforms.
I'm also Microsoft MVP.
Want to hear more from me? Follow me or check me out on Twitter.
Hi lovely readers,
Do you want to get into Flask? I’ll guide you through how to get started by making a classic project. a to-do list. In this blog post, you will learn Flask, Jinja2, Sqlite3, HTML, and how to build CRUD functionalities. Let’s get started!
Prerequisites
You have Python installed. I used Python 3.11.
You know how conditions and loops work.
You know what classes, functions, and parameters are.
You know how basic SQL statements work
What you’re NOT going to learn
CSS.
I want you to focus on functionality. CSS and design can come later. Do you want to learn CSS or a CSS framework? There are great resources out there. Look for them on Hashnode.
Security.
This application is NOT secure. Keep this in mind if you want to run this online.
SQLAlchemy.
SQLAlchemy works great with Flask, but it also hides what's happening. That's why I challenge you to write the SQL statements yourself.
How to build an API.
This is a project that collects data from SQL and sends it to the frontend. There's no API involved.
Step 1: Project setup
Begin by installing Flask using the following command:
pip install flask
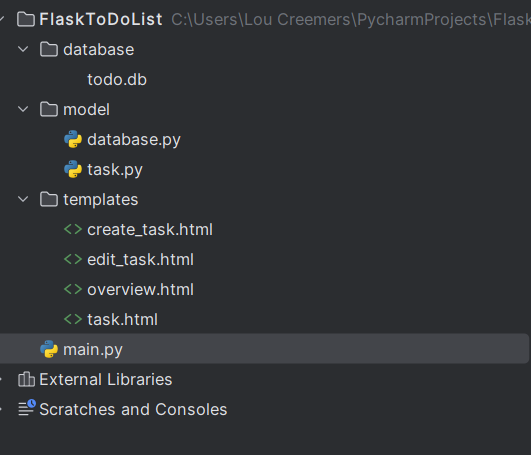
Create a project folder on your disk (I called it FlaskToDoList). Structure the folders inside it like this:
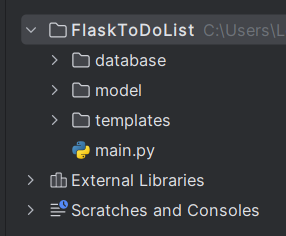
Add the database, model, and templates folders, and add a main.py file.
Step 2: Create and fill a database file
In the 'database' folder, make a file named ‘todo.db.’ This database file starts empty. We need some test data, so you have to create a 'tasks' table and add your first to-do tasks.
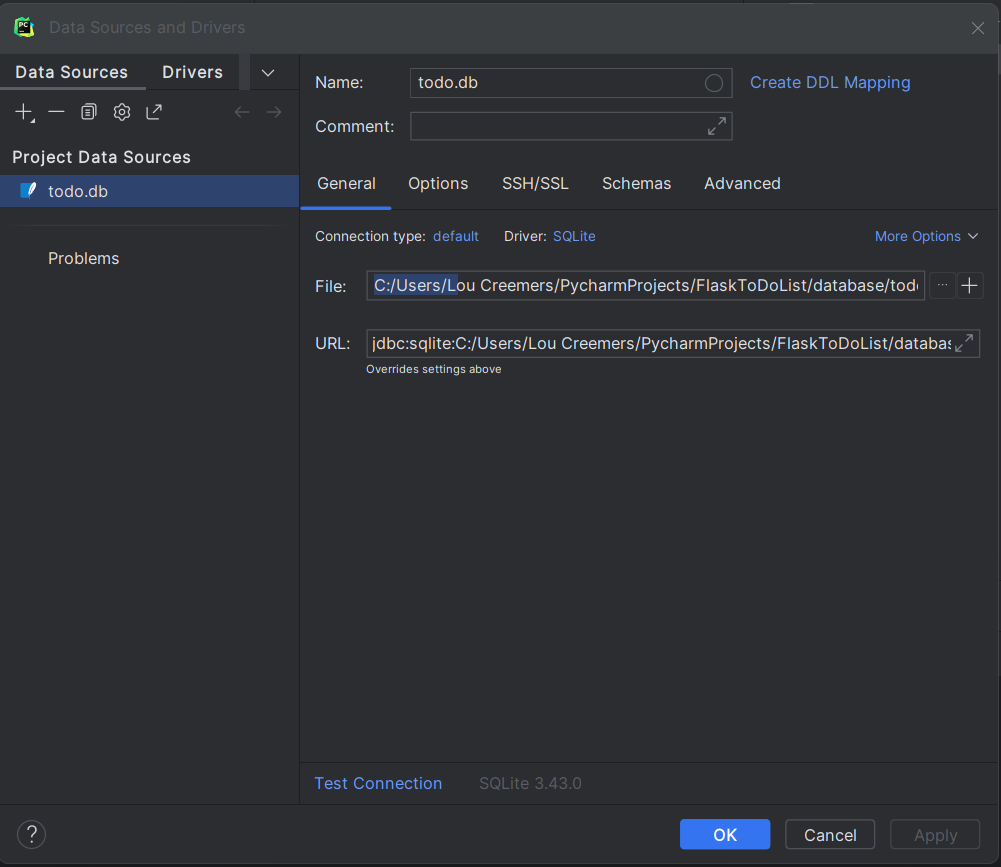
If you use PyCharm, open the database from your IDE by clicking on it. If you use VS Code, you might need to install an extra tool like Sqlite DB Browser to manage the database.
Let’s create a ‘tasks’ table. To do that, we need to open the query console or any other place where we can execute SQL. If you’re using PyCharm you can go to View > Databases. It will then ask which database you want to connect with. It will (hopefully) detect your todo.db. Click ‘OK’.
You should now see a side menu popping up, right-click on todo.db > New > Query Console.
From here you can create a table called ‘tasks’:
CREATE TABLE IF NOT EXISTS tasks (
    task_id INTEGER PRIMARY KEY,
    task_name TEXT NOT NULL,
    task_description TEXT,
    due_date DATETIME,
    priority INTEGER,
    status TEXT,
    created_at DATETIME DEFAULT CURRENT_TIMESTAMP
);
Now insert 2 demo tasks that you can use later on:
-- Inserting the first task
INSERT INTO tasks (task_name, task_description, due_date, priority, status)
VALUES ('Complete Project Report', 'Finish writing and editing the project report', '2023-01-31 18:00:00', 2, 'To Do');

-- Inserting the second task
INSERT INTO tasks (task_name, task_description, due_date, priority, status)
VALUES ('Prepare Presentation', 'Create slides for the project presentation', '2023-02-15 14:30:00', 1, 'In Progress');
Finally, check if the INSERT query worked by using a SELECT statement:
SELECT * FROM tasks;
Step 3: Set up main.py
Now it’s time to create the main file which your project will start from. In different Python projects, you will see different names (startpoint.py, start.py, app.py, main.py) for the start-up file. I am used to main.py, so I’m going to use that as my start-up file.
To run Flask from the very first time, this should be in the main.py file:
from flask import Flask

app = Flask(__name__)

if __name__ == "__main__":
    app.run(debug=True)
This piece of code will run the Flask server once you run it in debug mode. You can run it by pressing the play button on the right top of your IDE or by running the following command:
flask --app main --debug run
Do you have another start-up file name? Change main into your start-up file name (start, app, etc).
When you get Flask to run it will show you a link in the console (127.0.0.1:5000 when using standard Flask configuration). Go there and you will see a ‘Not Found’ page:

This is because there’s nothing on that page right now. We will fix this by creating your first app route in the next part.
Step 4: Creating your first route
Creating an app route that only returns HTML is luckily not that difficult. You need a page that goes to the root, so the file immediately loads in when you go to 127.0.0.1:5000. The root route is always located at ‘/’. So we need a route to /, and a function that returns a piece of HTML to show.
from flask import Flask

app = Flask(__name__)

@app.route('/')
def home_page():
    return '<p>Hello World</p>'

if __name__ == "__main__":
    app.run(debug=True)
Now if you go to the link on which Flask is running you will see something like this:
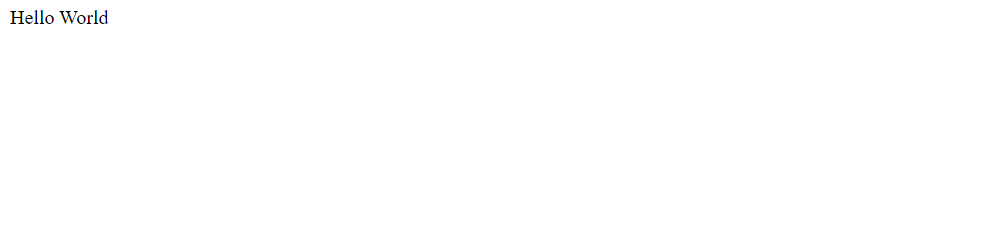
This is because the browser asks Flask ‘Alright, what does the root route expect? I see, this HTML tag.’ Then it shows that HTML tag on the page.
Step 5: Creating a database model
I don’t want to write all the lines that we need to connect to the database in every single file where I need SQL. This is why I want one class called Database that I can call from everywhere if I need to write an SQL statement. Put this model in the model folder and call it database.py. Let’s create database.py with a Database class:
import sqlite3 # Imports the sqlite3 module

class Database(object):
    def __init__(self, path):
        self.path = path # Ask for the database file path whenever Database() is called

    def connect_db(self):
        con = sqlite3.connect(self.path) # Make a connection with the database stored in path
                con.row_factory = sqlite3.Row # Save results in rows instead of a tuple
        cursor = con.cursor() # Cursor for executing SQL statements
        return cursor, con # Return the cursor and the db connection
We’re using a SQLite database so we need to import the module that helps with SQLite databases. This is pre-installed for you in Python. You can import it by starting the file with ‘import sqlite3’. After that, we are going to create a class Database. We tell this class the path where the database is so that SQLite can use that database file. The function will then create a connection for committing statements, and a cursor for writing SQL statements.
Step 6: Creating a task object model
We also need a class called Task where we store all the SQL logic for task features. Let’s call this file task.py, and put that in the model folder.
Imagine that we had another table, for example, 'users' because we have a login screen. You should then also create an object model called User. But let's keep it simple with one table.
Let’s create a Task class and use the database class in there. With the database connection, you can now use it for each function you’re going to create later on:
from model.database import Database

class Task():
    def __init__(self):
        database = Database('./database/todo.db')
        self.cursor, self.con = database.connect_db()
Step 7: Getting some terms clear
We need to discuss some things before we get started with the task functionalities. Of course, we need to be well prepared. The things you need to know beforehand are 1. CRUD, 2. HTTP Methods, 3. The project structure
CRUD
CRUD stands for Create, Read, Update, Delete. These are all functionalities you should be able to do with tasks on a to-do list. You should be able to create a task. You should be able to read (or show) all tasks and a single task. You should be able to update (or edit) a task. Finally, you should be able to delete a task.
You see CRUD a lot in programming. You don’t only use it in a to-do app with tasks, but pretty much in every single application you can imagine. In a webshop, you need to be able to create, read, update, and delete products you sell. With a customer management system, you need to be able to create, read, update, and delete customers. With car design software, you need to be able to create, read, update, and delete car parts in the car you want to design. You can go on, it’s everywhere.
HTTP Methods
Now to HTTP Methods, which is something completely different. Flask helps you create websites, and websites use the HTTP protocol. This protocol helps the browser to figure out in which way it has to receive or send data. We call these HTTP Methods. There are many HTTP Methods, but I want to focus on the GET method and the POST method with you.
If you want to GET data from the database, like a list of tasks, and show it in your browser, you need to use the GET method. If you want to send something to the database, like new information about a task you would like to add to the database, you use a POST method. I always like to remember it by imagining a postal service. If I get something sent to me, I GET it from the postman delivered to my home address. If I want to send something to somebody (in this case the database) I have to POST it by walking to the POSTbox.
The Read and Delete functionalities are GET methods, you only get data (tasks, True after a deleted task). Create and Update are POST and GET methods because you want to store new data in the database if a user has clicked the submit button. But what if the submit button isn’t clicked? Then you want the browser to GET the form you created and show it in the browser.
The general structure of building this application
The way we’re going to build this project looks mostly the same for every single CRUD feature. You will always need an SQL statement, a route, and an HTML file with Jinja. But, the order changes a bit depending on if we’re using a POST or GET method. Let’s look at the illustration.
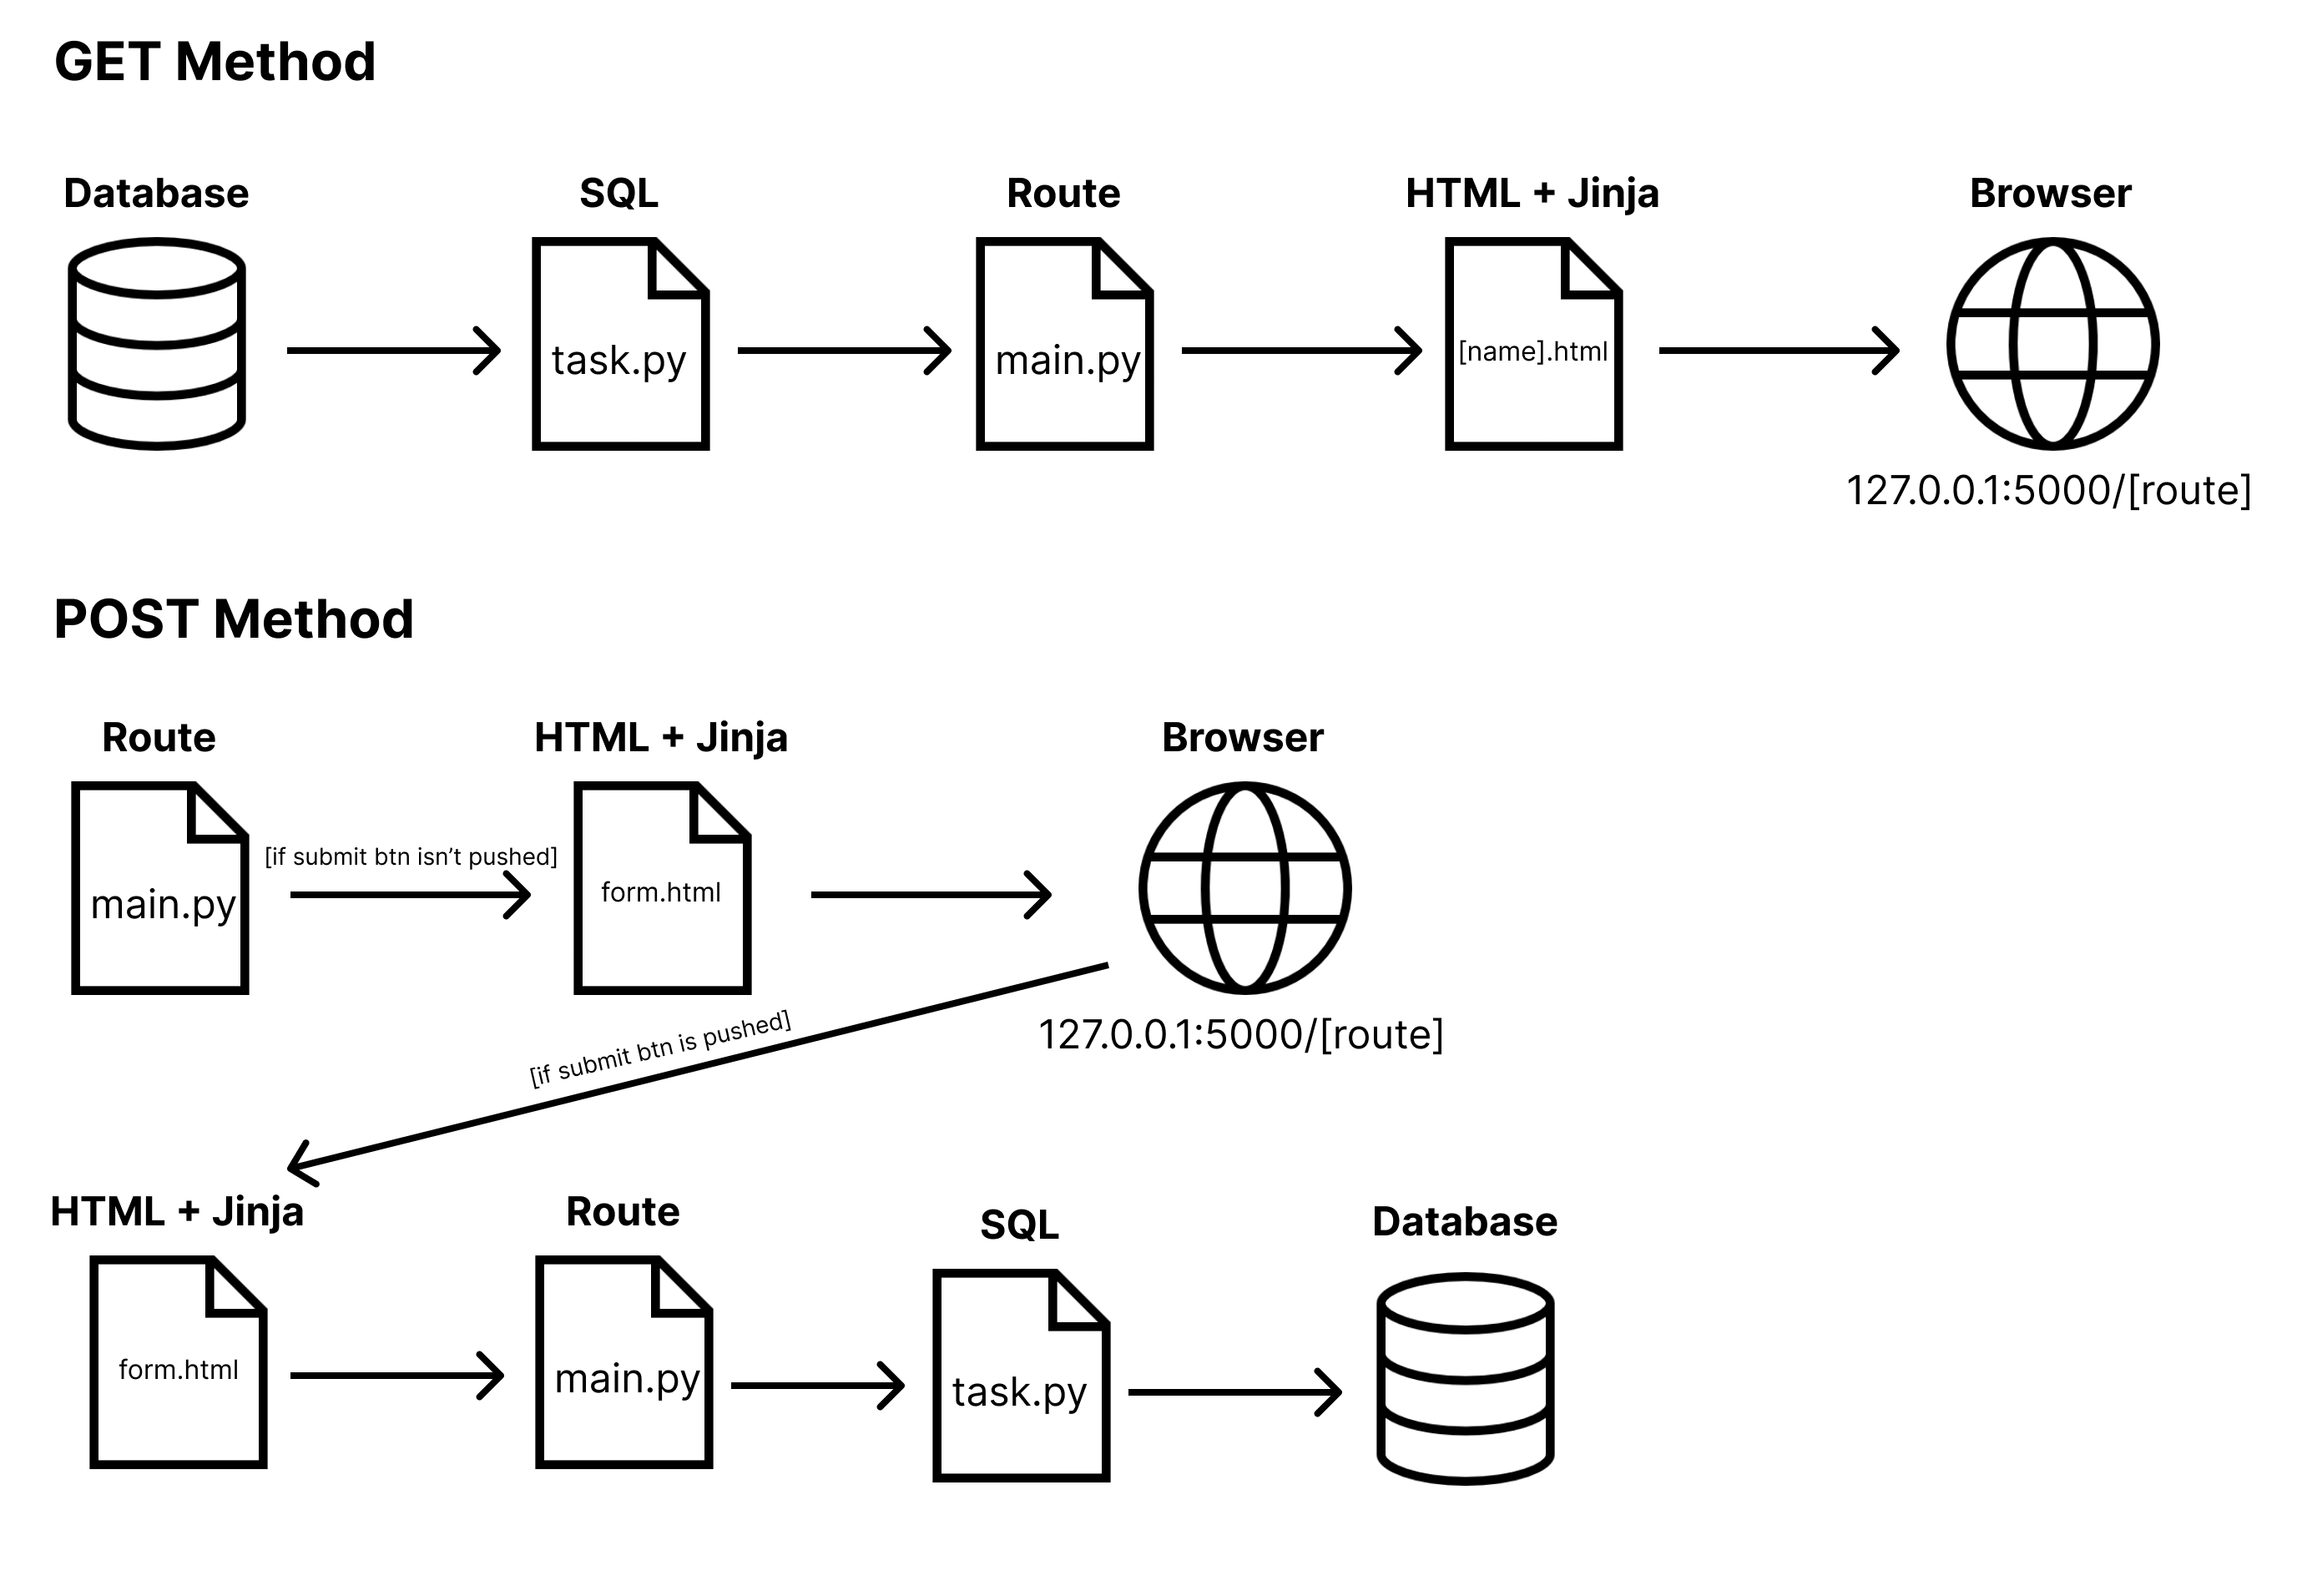
With a functionality that only uses the GET method, I like to start with SQL. We only want to get data from the database to show it, so we start with getting that data from the database. All the SQL logic should happen in an object model file.
Then you should create a Flask route. This route helps as a middleman, it transports the data that you got from the task.py file to the right HTML file. Finally, you use Jinja with HTML so you can tell the browser what the data is going to look like. For example, where the title of the task should go, or buttons or links. Jinja also makes it possible to use if statements and loops in your HTML file.
For a functionality that uses both the GET and POST methods, it’s a bit more difficult. You want the browser to show a form for input. This is the GET method part. Once the user pushes the submit button on the form, it will go back to the route. In the route function, you will store all the input you got from the form in a variable. Then you can send those variable values to the database through task.py with an INSERT SQL statement.
Step 8: Let's start with the R(ead) in CRUD
I always like to start with the R (Read) instead of the C (Create). That's why we're going to start with making an overview of the tasks you INSERTed at the beginning of this blog post. Once we've made the overview, we're going to focus on showing a single task.
Read is a GET method so we will be starting with the SQL statement in task.py. Next, we're going to add the route in main.py, and finally, an HTML file that fits the functionality. Keep in mind that people swap the word 'Read' with 'Show' very often, to make it easier to understand. They do have the same meaning though.
Step 8.1: Show all tasks
SQL
We will start with an SQL statement that will help us get all the tasks from the right table. For this, we need the 'SELECT *' statement. So let’s create a method that runs that statement and returns the results:
class Task():
    def __init__(self):
        database = Database('./database/todo.db')
        self.cursor, self.con = database.connect_db()

    def show_tasks(self):
        result = self.cursor.execute("SELECT * FROM tasks").fetchall()
        return result
Route
Next, we’re going to create a route, so that we can send this data to a HTML page later on. We do this by creating a route in the main.py file like this:
from flask import Flask, render_template
from model.task import *

app = Flask(__name__)

@app.route('/')
def home_page():
    return '<p>Hello World</p>'

@app.route('/overview')
def overview():
    task_model = Task()
    all_tasks = task_model.show_tasks()
    return render_template("overview.html", all_tasks=all_tasks)

if __name__ == "__main__":
    app.run(debug=True)
This function is linked to '/overview' (127.0.0.1:5000/overview if you’re following the regular Flask configuration). You need the show_tasks() function that's in the Task class.. You do that by calling Task() and then storing it in a variable. Then you can get all tasks by calling the show_tasks function and also store that in a variable. Finally, you can tell Flask to send the data to an HTML page. For this, you can use the render_template feature and tell Flask which HTML page, and what data you want to use in that page. In this case, you want to use all the tasks you requested.
HTML + Jinja
Let’s show the data you got from your database and just sent over through a route on an HTML page. Name this file 'overview.html' to match the render_template within the overview function. You should put this HTML file in the templates folder.
Now we need an HTML page that shows all the task titles in a list. Let’s do that like this:
<!DOCTYPE html>
<html lang="en">
<head>
    <meta charset="UTF-8">
    <title>Title</title>
</head>
<body>
        <h1>Tasks overview</h1>
    <ul>
            <li> Placeholder Task 1 </li>
            <li> Placeholder Task 2 </li>
    </ul>
</body>
</html>
As you can see there’s placeholder text in there. We now need to print all the list items in all_tasks that you sent over through the render_template.
What do we need if we want to print all items in a list? Right, a for loop. We can create a for loop in an HTML page thanks to Jinja. Let’s implement it like this:
<!DOCTYPE html>
<html lang="en">
<head>
    <meta charset="UTF-8">
    <title>Title</title>
</head>
<body>
        <h1>Tasks overview</h1>
    <ul>
        {% for task in all_tasks %}
        <li>{{task.task_name}}</li>
        {% endfor %}
    </ul>
</body>
</html>
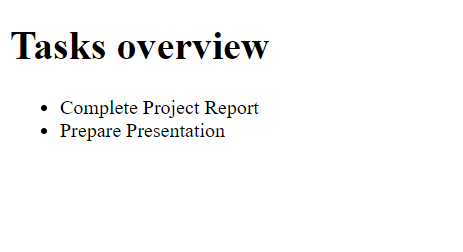
This loop will now go through each task in all_tasks. For every task, you can add the task_name, the database column that stores the title, to a <li> tag.
Result
Now if you go to 127.0.0.1:5000/overview, you will see this:
Step 8.2: Show single task
For showing the details of a single task we are going to follow the same structure: 1. SQL, 2. Route, 3. HTML + Jinja.
SQL
What do we need to get a single task? What makes a task unique? Right, the primary key. Because the primary key is always unique. In the tasks table, the primary key is the task_id column
Let’s create a function inside task.py where we collect a single task based on the primary key with an SQL statement:
from model.database import Database

class Task():
    def __init__(self):
        database = Database('./database/todo.db')
        self.cursor, self.con = database.connect_db()

    def show_tasks(self):
        result = self.cursor.execute("SELECT * FROM tasks").fetchall()
        return result

    def show_task(self, task_id):
        result = self.cursor.execute("SELECT * FROM tasks WHERE task_id = ?", (str(task_id))).fetchone()
        return result
As you can tell from show_task(), we give the function a task_id as a parameter and use the WHERE clause. By using the where clause on task_id, the database will always return one or 0 results.
Route
Now let’s create a route that sends the data from a single task over to an HTML page.
from flask import Flask, render_template
from model.task import *

app = Flask(__name__)

@app.route('/')
def home_page():
    return '<p>Hello World</p>'

@app.route('/overview')
def overview():
    task_model = Task()
    all_tasks = task_model.show_tasks()
    return render_template("overview.html", all_tasks=all_tasks)

@app.route('/task/<task_id>')
def show_task(task_id):
    task_model = Task()
    single_task = task_model.show_task(task_id)
    return render_template("task.html", single_task=single_task)

if __name__ == "__main__":
    app.run(debug=True)
As you can tell there’s something a bit odd about the new route, there’s a <task_id> part in there. This part of the route is dynamic. This means that placing anything in that part of the route will store it in a parameter called task_id. If you go to /task/1 in your browser, it will store 1 as task_id, if you go to /task/40 in your web browser, it will store 40 as task_id. With this task_id from your route, you can call the show_task() function stored in the Task class. Give the show_task() function the task_id as a parameter value. This should then return a single task.
You want to show this task on an HTML page, right? Then we need to use render_template again where we call the HTML page we want to use first, and the data we want to use on that page. In this case, we want the single task data on the task.html page.
HTML + Jinja
Create an HTML file in the templates folder called ‘task.html’ to match the render_template part in the route you created. Let’s first create an HMTL page with placeholder information in there:
<!DOCTYPE html>
<html lang="en">
<head>
    <meta charset="UTF-8">
    <title>Title</title>
</head>
<body>
    <p>Name: Placeholder task </p>
    <p>Description: This is a placeholder </p>
    <p>Due date: 23-12-2023 16:53</p>
    <p>Priority: 2023-01-31 18:00:00 </p>
    <p>Status: 1</p>
    <p>Create date: 2023-12-21 21:52:07</p>
</body>
</html>
Now we want to use the single_data data we got from the render_template, instead of the placeholder information. Let’s use Jinja to do that:
<!DOCTYPE html>
<html lang="en">
<head>
    <meta charset="UTF-8">
    <title>Title</title>
</head>
<body>
    <p>Name: {{single_task.task_name}}</p>
    <p>Description: {{single_task.task_description}}</p>
    <p>Due date: {{single_task.due_date}}</p>
    <p>Priority: {{single_task.priority}}</p>
    <p>Status: {{single_task.status}}</p>
    <p>Create date: {{single_task.created_at}}</p>
</body>
</html>
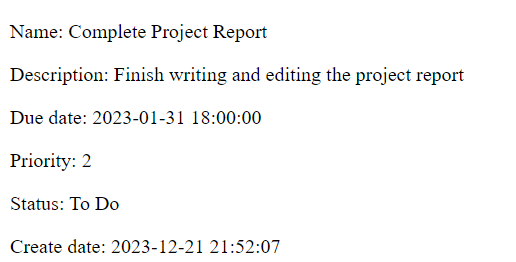
Result
If you go to 127.0.0.1:5000/task/1, you should see this:
If you go to 127.0.0.1:5000/task/2, it should look like this:

Small tweaks
We can now view both an overview of tasks at ‘/overview’ and the details of a task at ‘/task/<task_id>’. But we can only do this by going to the right route. Let’s make the tasks in the overview page clickable, and let us add a button to go back to the overview on the detail page.
First, make the tasks in the overview clickable by adding <a> tag:
<!DOCTYPE html>
<html lang="en">
<head>
    <meta charset="UTF-8">
    <title>Title</title>
</head>
<body>
        <h1>Tasks overview</h1>
    <ul>
        {% for task in all_tasks %}
        <li><a href="/task/{{task.task_id}}">{{task.task_name}}</a></li>
        {% endfor %}
    </ul>
</body>
</html>
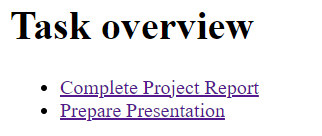
With this <a> tag, the name of each task now links to the task detail page with whatever task_id belongs to that task. This should look like this in the browser:
We still need a button that goes back to the overview page on the detail page. We can do this by adding a regular HTML button with an <a> tag in there that links to the ‘/overview’ route:
<!DOCTYPE html>
<html lang="en">
    <head>
        <meta charset="UTF-8">
        <title>Title</title>
    </head>
    <body>
        <p>Name: {{single_task.task_name}}</p>
        <p>Description: {{single_task.task_description}}</p>
        <p>Due date: {{single_task.due_date}}</p>
        <p>Priority: {{single_task.priority}}</p>
        <p>Status: {{single_task.status}}</p>
        <p>Create date: {{single_task.created_at}}</p>

        <button><a href="/overview"> Go back to overview </a> </button>
    </body>
</html>
Step 9: The C(reate) in CRUD
We've covered the Read part of the CRUD functionality for our to-do list app. Now, let's dive into the Create Task functionality. After all, we always have new tasks to add to our to-do list, right? The create functionality involves both the GET and POST methods, so let's begin with the route.
Route (GET)
The first thing we need to do is on the first line in main.py, you need to import two extra functions from the Flask package. These are ‘request’ and ‘redirect’. We’re going to use these for our create_task function.
from flask import Flask, render_template, request, redirect
We will add the route to the existing routes that are in the main.py file. There’s not much of a difference to the app.route line, except that we now have to add that the route should allow both POST and GET methods. It’s standard that Flask only allows GET requests so you have to explicitly allow POST requests as well.
@app.route('/create_task', methods=['GET', 'POST'])
def create_task():
    if request.method == 'POST': #if submit button was ever clicked
         #To do
    else: # if submit button hasn't been clicked yet.
        return render_template('create_task.html')
You will need a form with a submit button to add a new task. If you know your HTML, you know this already. When the submit button isn’t clicked there's a big chance that it means that the user hasn’t opened the form yet. So, this means that in this case, you want to show a form that’s stored in ‘create_task.html’ through the GET method. After we've made the HTML file, we're going to continue with the POST method.
HTML
For this form we only need HTML. There’s no Jinja needed because the empty form will never change. Let’s create an HTML file called create_task.html in the templates folder like this:
<!DOCTYPE html>
<html lang="en">
<head>
    <meta charset="UTF-8">
    <title>Title</title>
</head>
<body>
<h2>Create Task</h2>

    <form method="POST">
        <label for="task_name">Task Name:</label>
        <input type="text" id="task_name" name="task_name" required>
        <br>

        <label for="task_description">Task Description:</label>
        <textarea id="task_description" name="task_description" rows="4" cols="50"></textarea>
        <br>

        <label for="due_date">Due Date:</label>
        <input type="date" id="due_date" name="due_date">
        <br>

        <label for="priority">Priority:</label>
        <select id="priority" name="priority">
            <option value="1">1 - High</option>
            <option value="2">2 - Medium</option>
            <option value="3">3 - Low</option>
        </select>
        <br>

        <label for="status">Status:</label>
        <select id="status" name="status">
            <option value="to do">To Do</option>
            <option value="in progress">In Progress</option>
            <option value="completed">Completed</option>
        </select>
        <br>

        <input type="submit" value="Create Task">
    </form>
</body>
</html>
Note that Flask will later use the name section (input name='name') to store the value in a variable. In the form, all columns that are in the Task table should be in there EXCEPT for the id, and the date created. The task_id auto increments and the created_date is on CURRENT TIMESTAMP. This means that SQL will automatically determine which value those columns will need. Don’t forget to add POST to the method of the form and to add a submit button at the bottom.
When the user clicks the submit button, we should gather all the information that got entered into the form by using the POST method. That is the moment the browser makes a request back to the route.
Route (POST)
Now let’s start with the request.method == ‘POST’ part which is true once the submit button on the form gets clicked. Let’s collect all the input by storing them in a variable.
@app.route('/create_task', methods=['GET', 'POST'])
def create_task():
    if request.method == 'POST':
        task_name = request.form.get('task_name')
        task_description = request.form.get('task_description')
        due_date = request.form.get('due_date')
        priority = request.form.get('priority')
        status = request.form.get('status')

        task_model = Task()
        new_task_status = task_model.create_task(task_name, task_description, due_date, priority, status)

        if new_task_status:
            return redirect('/overview')
    else:
        return render_template('create_task.html')
As I mentioned earlier, Flask noticed the value of an input box by the ‘name’ part. So we know that we need ‘task_name’, ‘task_description’, ‘due_date’, ‘status’, and ‘priority’. We can store these all in a variable by using request.form.get() function from the Flask package, with the name as a value.
Then we can access the create_task() function stored in the Task class, which we are going to create after this. Give this function all the variables we just filled so we can use it for the SQL statement as parameters. Finally, let’s say that once the SQL statement is complete, we return True as a value. After creating the task and getting true status, the system will redirect the user to the overview page.
SQL
Now let’s create that create_task function in the task object model (task.py) with an INSERT statement that matches the variables we added as parameters.
def create_task(self, task_name, task_description, due_date, priority, status):
        self.cursor.execute(
            "INSERT into tasks (task_name,task_description,due_date,priority,status) VALUES (?,?,?,?,?)",
            (task_name, task_description, due_date, priority, status))
        self.con.commit()

        return True
This function needs the parameters that we sent from the route function. Then we’re going to execute the SQL statement that INSERTS the task into the tasks table. Next, tell the database connection to commit the INSERT statement. At last return True so that Flask knows to redirect the user to overview.
Small tweaks
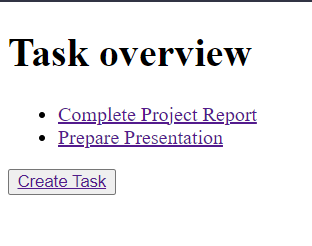
Now there’s only one thing we still need: a ‘create new task’ button on the overview page. Add a button with an <a> tag inside of it again and link to ‘/create_task’ on the overview.html page:
<!DOCTYPE html>
<html lang="en">
<head>
    <meta charset="UTF-8">
    <title>Title</title>
</head>
<body>
    <h1> Task overview </h1>
    <ul>
        {% for task in all_tasks %}
        <li><a href="/task/{{task.task_id}}">{{task.task_name}}</a></li>
        {% endfor %}
    </ul>
    <button><a href="/create_task">Create Task</a></button>
</body>
</html>
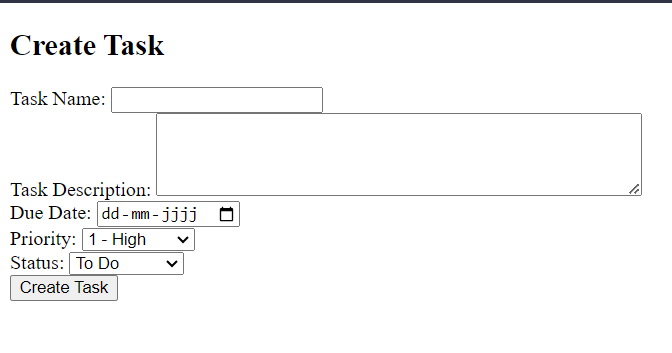
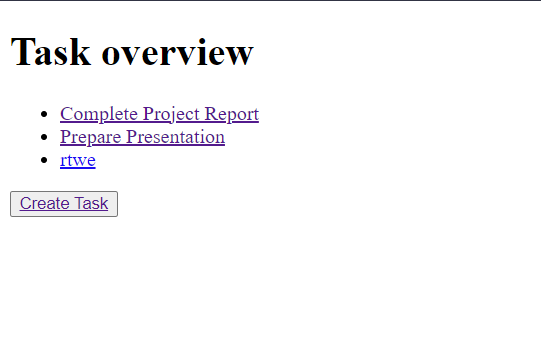
Results
Let’s test it out. Click on the ‘Create Task’ button on the overview page and you should see something like this:
Once you’ve pushed the ‘Create Task’ button, the app will redirect you to the overview page. You should see the task just made there. I just typed something and created a task called ‘rtwe’:
Step 10: The U(pdate) in CRUD
The Update functionality is a funny functionality. This is because it’s a mix between show_task we’ve created for the Read functionality and the Create functionality. Let me show you.
Route (GET)
This functionality uses both the GET and the POST method so we’re starting with the route again. Also, for the sake of simplicity in the route let’s call it edit instead of update in the main.py file:
@app.route('/edit_task/<task_id>', methods=['GET', 'POST'])
def edit_task(task_id):
    task_model = Task()
    if request.method == 'POST':
                #implement this later
    else:
        existing_task = task_model.show_task(task_id)
        return render_template('edit_task.html', existing_task=existing_task)
If the submit button isn’t pressed yet we want to see a form with the data of the task we want to update in the right input boxes. How do we get all the data from a single task? The function show_task() in the Task class we already made. Store the result in a variable. Next, we are going to use render_template again and tell it the HTML page where the update form is, and give it the data it needs. In this case, we'll give it the existing_task variable.
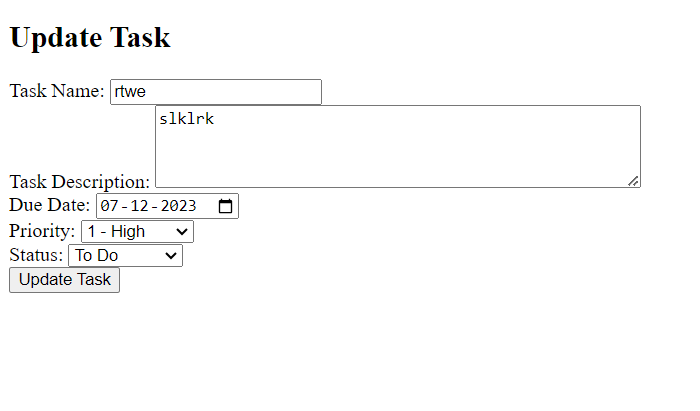
HTML + Jinja
For the HTML page, we also don’t need to be creative. Because we can only update the columns that are already in the create_task.html form. We’re going to copy and paste what’s in that file to the new edit_task.html file and make some small adjustments.
When updating a task, a user expects that the input boxes on the form are already filled with the original data. That’s also why we’re using the show_task() function in the route, and sending that to the HTML page. Because we are working with this data from the route, we will use Jinja to fill in the input boxes that are empty in the create_task form.
<!DOCTYPE html>
<html lang="en">
<head>
    <meta charset="UTF-8">
    <title>Title</title>
</head>
<body>
    <h2>Update Task</h2>

    <form method="POST">
        <label for="task_name">Task Name:</label>
        <input type="text" id="task_name" name="task_name" value="{{ existing_task.task_name }}" required>
        <br>

        <label for="task_description">Task Description:</label>
        <textarea id="task_description" name="task_description" rows="4" cols="50">{{ existing_task.task_description }}</textarea>
        <br>

        <label for="due_date">Due Date:</label>
        <input type="date" id="due_date" name="due_date" value="{{ existing_task.due_date }}">
        <br>

        <label for="priority">Priority:</label>
        <select id="priority" name="priority">
            <option value="1" {% if existing_task.priority == '1' %} selected {% endif %}>1 - High</option>
            <option value="2" {% if existing_task.priority == '2' %} selected {% endif %}>2 - Medium</option>
            <option value="3" {% if existing_task.priority == '3' %} selected {% endif %}>3 - Low</option>
        </select>
        <br>

        <label for="status">Status:</label>
        <select id="status" name="status">
            <option value="to do" {% if existing_task.status == 'to do' %} selected {% endif %}>To Do</option>
            <option value="in progress" {% if existing_task.status == 'in progress' %} selected {% endif %}>In Progress</option>
            <option value="completed" {% if existing_task.status == 'completed' %} selected {% endif %}>Completed</option>
        </select>
        <br>

        <input type="submit" value="Update Task">
    </form>
</body>
</html>
There isn’t that much difference. The only difference between this form and the create_task.html form is that this form is now filled with the current values of the task. For the text-related input boxes, this consists of adding a value with Jinja syntax. For the select boxes, you need an if statement. If the value equals 1, priority 1 should be selected. If value equals 2, priority 2 should be selected, etc.
Route (POST)
The POST is almost a duplicate of the create_task POST part. You put all the values that were in the input boxes in variables and send them to the Task class. But, instead of using the create_task() function, you use the update_task() function and also add the task_id as a parameter.
@app.route('/edit_task/<task_id>', methods=['GET', 'POST'])
def edit_task(task_id):
        task_model = Task()
    if request.method == 'POST':
        task_name = request.form.get('task_name')
        task_description = request.form.get('task_description')
        due_date = request.form.get('due_date')
        status = request.form.get('status')
        priority = request.form.get('priority')

        updated_task_status = task_model.update_task(task_id, task_name, task_description, due_date, status, priority)
        if updated_task_status:
            return redirect('/overview')
    else:
        existing_task = task_model.show_task(task_id)
        return render_template('edit_task.html', existing_task=existing_task)
SQL
Let’s now create the UPDATE statement in SQL that can update the task that has just been changed in the task.py file:
def update_task(self, task_id, task_name, task_description, due_date, priority, status):
        self.cursor.execute(
            "UPDATE tasks SET task_name=?, task_description=?, due_date=?, priority=?, status=? WHERE task_id=?",
            (task_name, task_description, due_date, priority, status, task_id))
        self.con.commit()

        return True
Write the SQL statement with the cursor. Commit it by using the database connection. Then return True so that Flask knows to redirect the user to ‘/overview’.
Small tweaks
The last thing is adding an edit task button to the task detail HTML page (task.html) like this:
<!DOCTYPE html>
<html lang="en">
    <head>
        <meta charset="UTF-8">
        <title>Title</title>
    </head>
    <body>
        <p>Name: {{single_task.task_name}}</p>
        <p>Description: {{single_task.task_description}}</p>
        <p>Due date: {{single_task.due_date}}</p>
        <p>Priority: {{single_task.priority}}</p>
        <p>Status: {{single_task.status}}</p>
        <p>Create date: {{single_task.created_at}}</p>

        <button><a href="/overview"> Go back to overview </a> </button>
        <button><a href="/edit_task/{{single_task.task_id}}"> Edit task </a> </button>
    </body>
</html>
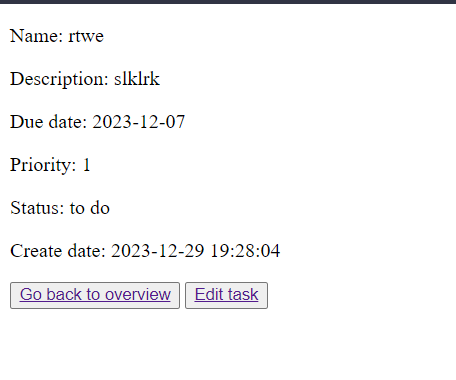
Result
Let’s open the task ‘rtwe’ that I created in step 9, and click the ‘Edit task’ button.
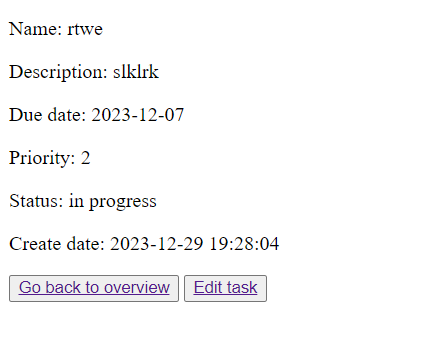
Change something. In my case, I’m changing Priority to 2 and Status to 'In Progress'.
Open the task again and you will see that the priority and status have changed.
Step 11: The D(elete) in CRUD
Let’s get started with the very last feature 🥳. This is the Delete functionality. We are going to use the GET method to delete tasks (feel free to use the DELETE method instead if you want to be more secure) so let's get started with the SQL statement.
SQL
Let’s create a delete_task() function in the task.py file like this:
def delete_task(self, task_id):
    self.cursor.execute("DELETE FROM tasks WHERE task_id=?", (str(task_id)))
    self.con.commit()
We need the task_id as a parameter, otherwise SQL won’t know which task to remove. The SQL statement is almost identical to the SQL statement of the show_task() function when you replace ‘SELECT *’ with ‘DELETE’. Let’s execute the statement with the cursor, and then commit it with the database connection.
Route
We are going to add the final route to main.py. This route also needs a task_id. After removing the task from the database, we should redirect the user back to the overview page
@app.route('/delete_task/<task_id>')
def delete_task(task_id):
    task_model = Task()
    task_model.delete_task(task_id)

      return redirect('/overview')
Little tweaks
We also need a ‘delete task’ button on the task detail page, so let’s add another button to the task.html file:
<!DOCTYPE html>
<html lang="en">
    <head>
        <meta charset="UTF-8">
        <title>Title</title>
    </head>
    <body>
        <p>Name: {{single_task.task_name}}</p>
        <p>Description: {{single_task.task_description}}</p>
        <p>Due date: {{single_task.due_date}}</p>
        <p>Priority: {{single_task.priority}}</p>
        <p>Status: {{single_task.status}}</p>
        <p>Create date: {{single_task.created_at}}</p>

        <button><a href="/overview"> Go back to overview </a> </button>
        <button><a href="/edit_task/{{single_task.task_id}}"> Edit task </a> </button>
        <button><a href="/delete_task/{{single_task.task_id}}"> Delete task </a> </button>
    </body>
</html>
Result
If we click on the ‘rtwe’ task from the overview, you will see a ‘Delete task’ button. Click this button.

If the task got removed successfully, it will redirect you back to the overview page and the 'rtwe' task will be gone:
Conclusion
Congratulations! You just created a fully working to-do list application.
If you implemented everything you should have the following functions in the main.py file: home_page, overview, show_task, create_task, edit_task, and delete_task. You should also have the following functions in the task.py file: init, show_tasks, show_task, create_task, update_task, and delete_task. Your project folder should look like this:
That’s a wrap!
You did it. You survived through this very long blog post. Congratulations. I hope that this blog post was helpful for your Python flask journey.
Do you have comments or questions? Feel free to leave them in the replies or reach out to me on any social platform. (find my socials on louella.dev/socials). See you in the next post!


